
Bleed explained: In the field of print design, bleed is a basic but very important concept. Whether you are a professional designer or just starting out in the industry, this is a must to master to ensure the quality and appearance of your final print. This article will introduce in detail the definition of bleed, why bleed is needed, how to set the bleed position, and some practical design suggestions to help you fully understand the printing bleed position in 3 minutes.
Bleeding Explained: Bleeding Definition
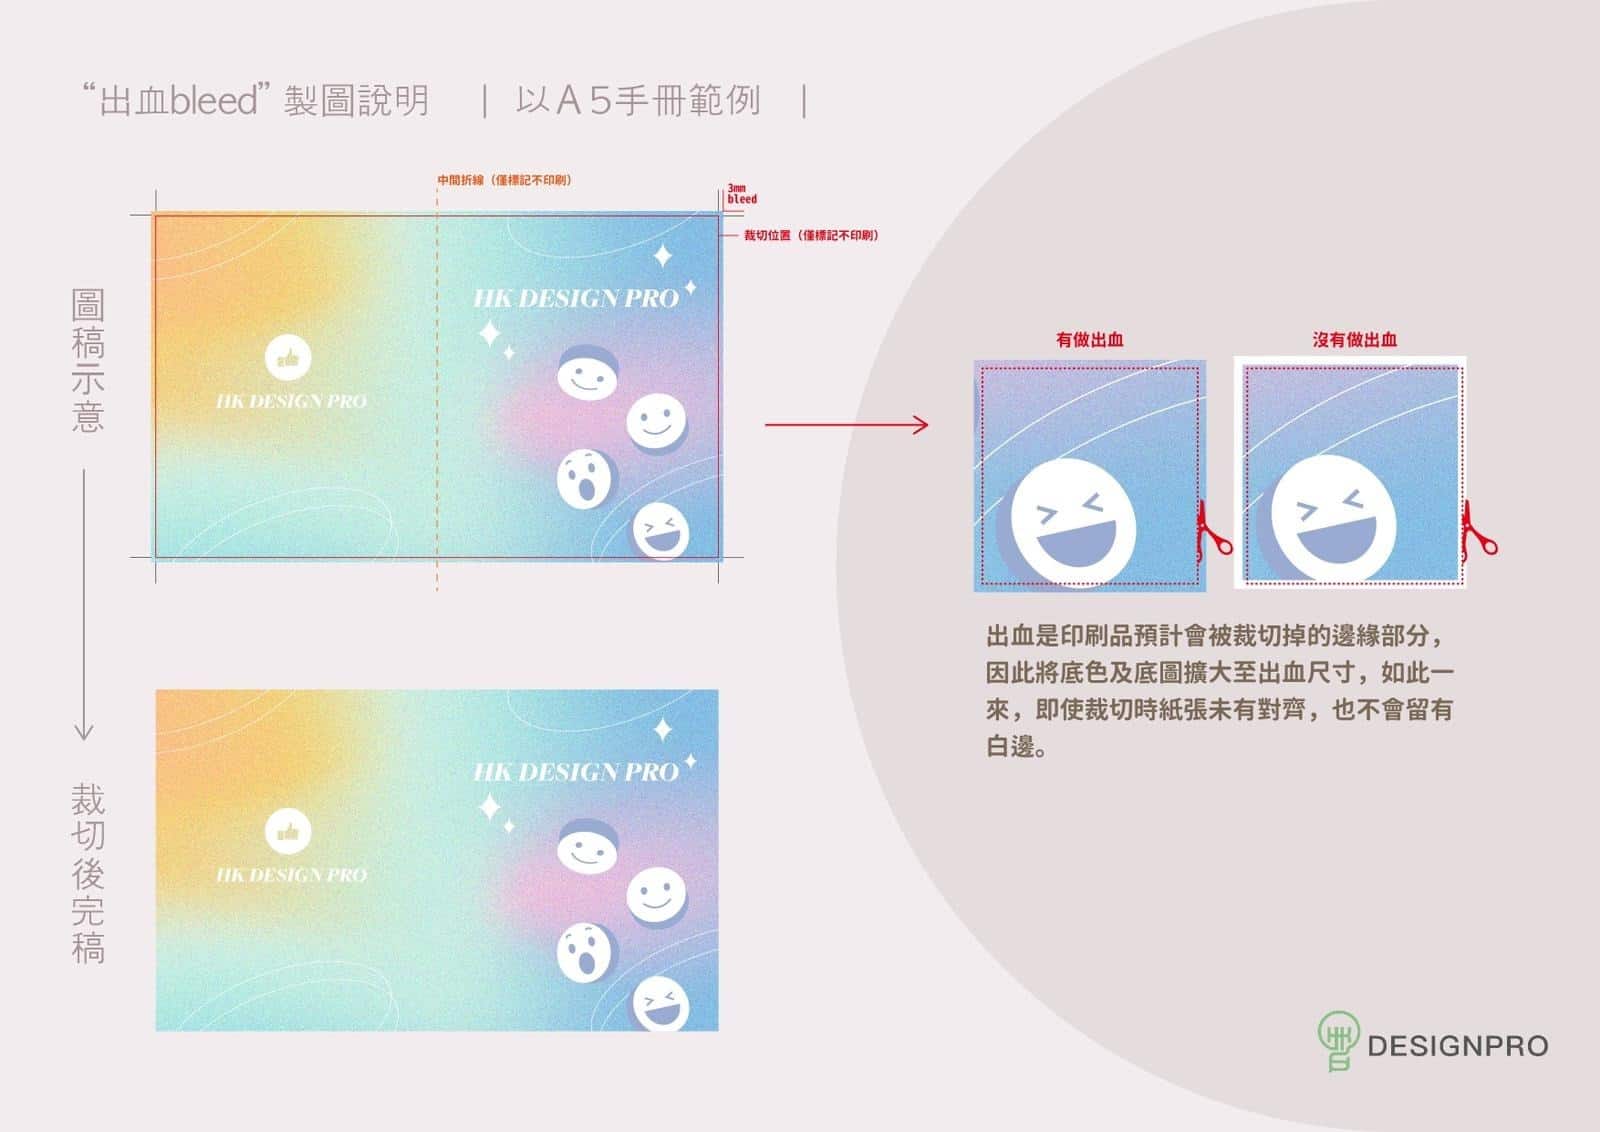
Bleed refers to the part of the design manuscript that exceeds the cutting line of the final product, and is usually set on the four sides of the manuscript. The purpose of this is to ensure that there are no unprinted white edges around the edges when the finished product is cut. Bleed areas will not appear in the final product and are a fault-tolerance measure during the printing process.
Why bleeding is needed
- Cutting tolerance : During the printing process, the paper will have a certain tolerance when cutting. Setting the bleed level can avoid white edges caused by inaccurate cutting.
- Improve visual effects : Through bleed design, the image or color can be extended to the edge of the paper, improving the visual effect and professionalism of the overall design.
- Reduce printing errors : Setting the bleed position can provide greater flexibility and adjustment space for the printing production process, and reduce printing errors caused by inaccurate cutting and other issues.


How to set the bleed bit
- Standard bleed size : Generally speaking, the standard size of bleed is 3 to 5 millimeters (mm), the specific size may vary according to different printers and product types.
- Design software settings : In mainstream design software such as Adobe InDesign, Illustrator, and Photoshop, the bleed level can be set at the initial stage of file creation. When setting, make sure that any image or color you want to extend to the edge of the paper extends into the bleed area.
- Precautions : Keep important text or image elements away from crop lines and bleed boundaries to avoid being cut off during the cropping process.
You may want to see: 9 common printing design solutions | bleed position | glossy paper | matte film | glossy film | glue binding | seam glue binding | hardcover
Practical design advice
- Identify important areas : When designing, a "safe area" should be determined, that is, all important elements (such as text, logos) should be placed within this area to avoid accidental cutting.
- Use professional software : Using the bleed setting function of professional design software can effectively avoid errors in the design process and ensure the accuracy of bleed setting.
- Communicate with the printing house : Before designing, communicate with the printing house to understand its specific bleeding requirements and file submission specifications to ensure that the design manuscript meets the printing requirements.
in conclusion
Bleed plays an integral role in print design, ensuring that the print looks beautiful and professional. By understanding the concept, importance, and how to set bleed levels correctly, designers can avoid many common printing problems and improve the overall quality of their work. Remember, bleeding is not only a technical requirement, but also a quality assurance. As technology advances and printing standards increase, mastering bleed design will make you stand out in the printing and design world.